Overview
The One 2 One service directs inbound calls from a single number to another single number, where callers wait in a virtual line until the call can be delivered to the new single destination. This article provides the steps to configure the One 2 One service after it has been assigned to a specific number.
Prerequisites
- One 2 One service has been assigned to the number.
- Access to the Nucleus platform.
Solution
Follow the steps below to set the most common One 2 One configuration options.
- Log into the Nucleus platform.
- Navigate to Call Handling > RNP: One 2 One.
-
<supportagent>
The Granting a Customer Access to Call Handling Features in the Nucleus Portal article will provide instructions if the customer is unable to see the One 2 One service in the Call Handling Menu. (Step 2)
The Changing the Service Type and the Termination Number in the Nucleus/BCH Portal will provide instructions pertaining to the number is set up with a different service type and is not displayed when searched for as a One 2 One service. (Step 5)
</supportagent>
-
Enter the number and click on Search.
-
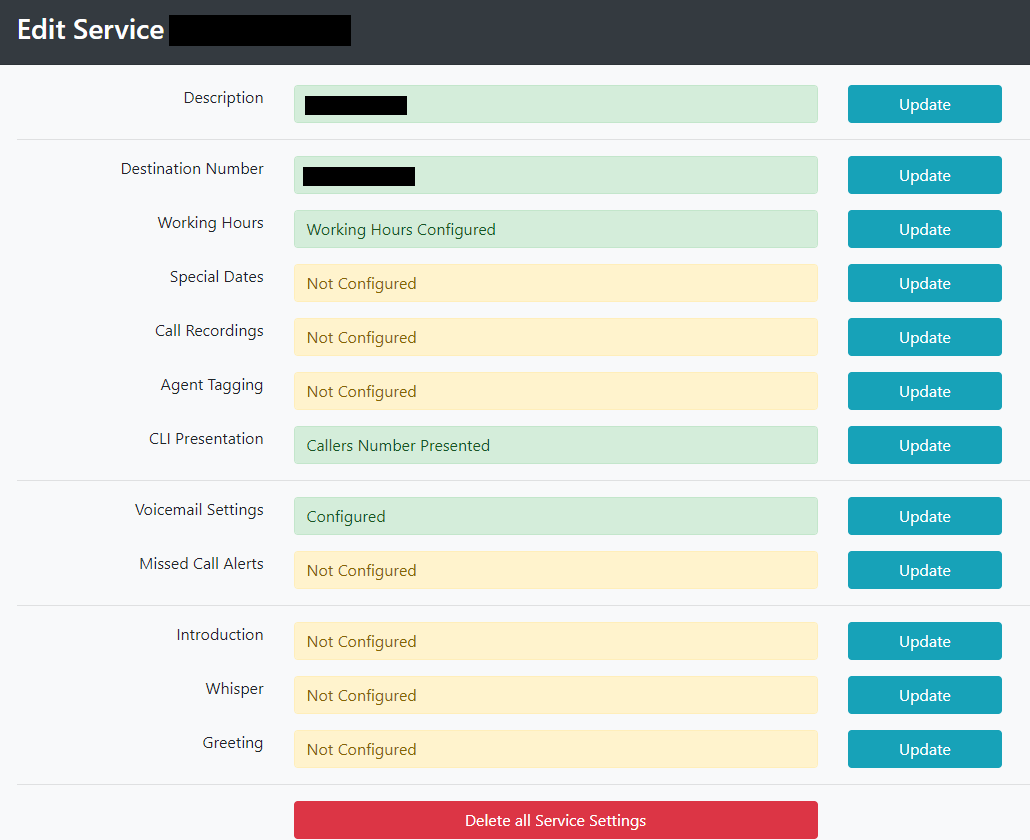
Click on the Configure option for the number.
- Click on the Update option for Destinations.
- Enter the destination number and select Save.
- You can also set the working hours for this service if desired.
- The options for Call Recordings, Voicemail and Missed Call Alerts are configured here for this service as well.
Testing
Once the One 2 One service has been configured, all inbound calls to the number will be directed to the number set up using the steps above.
Priyanka Bhotika
Comments