Overview
Times Schedules are used to differentiate between business and non-business hours. If your business hours have changed or calls are being received outside your business hours due to a configuration error, the Time Schedule used by your Auto Attendant needs to be modified. This article describes the process to accomplish this in the Business Portal.
Prerequisites
- Access to the Business Portal.
Solution
<supportagent> To access the customer's business portal:
- Log into the Business Portal.
- Navigate to the Companies section.
- Search for the customer by Company Name.
- Click on the Select option for the company in the results section.
</supportagent>
- In the Business Portal, go to the Sites tab and select the correct site.
- Navigate to Features > Call Groups.
- Click on Configure for the Auto Attendant feature.
- Click on the name of the Auto Attendant whose time schedule needs to be modified.
- Go to Auto Attendant Profile.
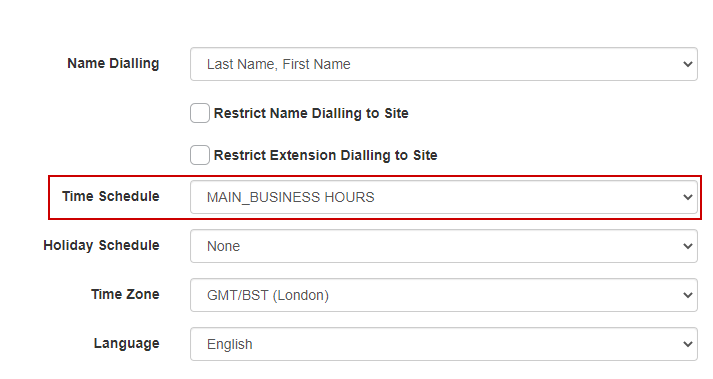
- Take note of the Time Schedule selected.
- Navigate to Features > Management.
- Click on Configure for Times Schedules.
- Click on the Time Schedule name acquired in step 6 to edit it.
- Review the time and adjust as desired.
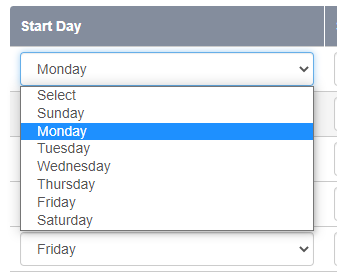
- To modify the Start or End Day, click on the dropdown list and select the day of the week.
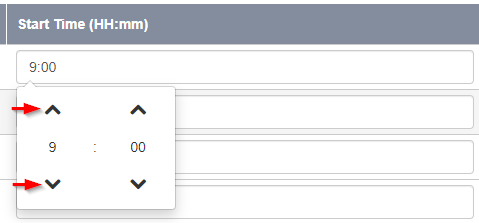
- To modify the Start or End Time, click on the time field and use the arrows to set the time.
- Click the Add Another option to include another day.
- To modify the Start or End Day, click on the dropdown list and select the day of the week.
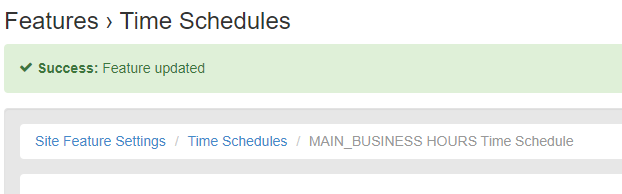
- Click on Save.
Testing
Once the Time Schedule has been updated, a confirmation message will be displayed and calls will only be routed during the business hours specified.
Priyanka Bhotika
Comments